I am in the process of constructing a new web site for three Year Eight History classes. The aim is for students to create and publish posts focused upon an empathetic appreciation and understanding of the past. They can post their stories using text, images, audio and/or video. The site itself is part of a WordPress multi-site.
During construction of the site I have been working with a number of useful plug-ins. These plug-ins include User Role Editor, Add Multiple Users, Menus and Toggle Meta Boxes. Let’s explore each in turn.
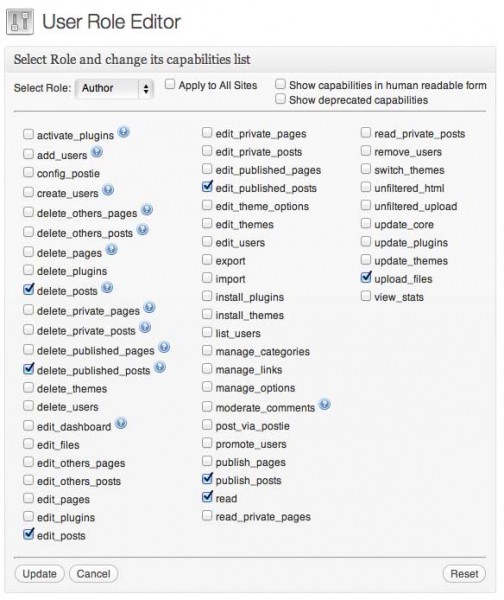
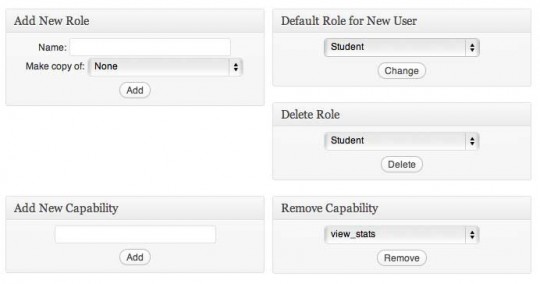
User Role Editor is a great example of WYSIWYG ~ what you see is what you get. This plug-in allows you to easily edit the capabilities of existing roles in WordPress as well as create entirely new roles. This is extremely useful if you wish to tweak the capability set of a specific WordPress user role such as Author so that your students have practical levels of access to the workings of WordPress. The plug-in is easy to use.
User Role Editor settings panel for the “Author” role
Role and Capability panels
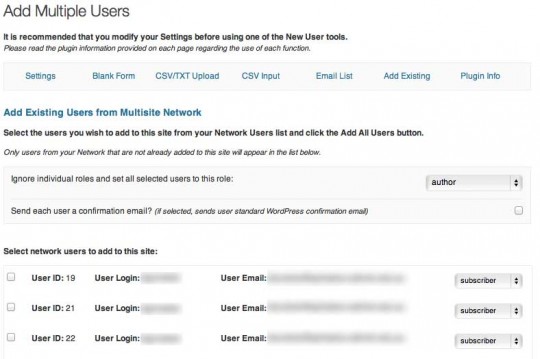
Add Multiple Users does exactly that. It allows the administrator of a wordpress blog or multisite to easily add multiple users to a site. As the settings panel for the plug-in explains the administrator can add users via the following methods:
- Blank Form: create a new form to manually input new user information
- CSV/TXT Upload: upload a CSV or TXT (comma-separated values) file containing your new user information
- CSV Input: Paste your CSV data containing your new user information instead of uploading it
- Email List: Convert a simple list of email addresses into new user information
- Add Existing: Add users to this site from the Network users list (Multisite only)
As you can see the plug-in provides a variety of practical approaches when it comes to adding a large number of users to a site.
Adding existing users in Add Multiple Users
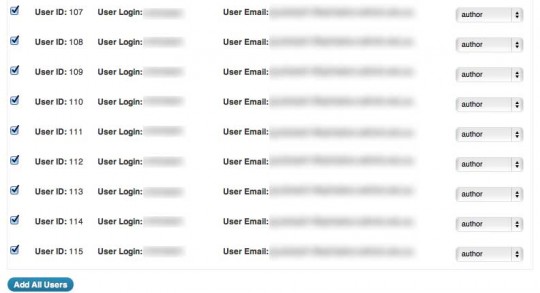
Adding existing users in Add Multiple Users
During class this afternoon a group of 30 students signed up to the WordPress network site I have established and they were issued with an activation link via email. Five of the students were up and running in moments so I rapidly redeployed each of the five to act as technical apprentices assisting others to get signed up, logged in and profile ready in an expeditious manner.
Each of the 30 students were added to the WordPress user database after they registered. I then added the students to the new site that I continued to construct this afternoon. I utilised the “Add Existing” option within the Add Multiple Users plug-in. It was easy. Next week 60 more students will be added to the site.
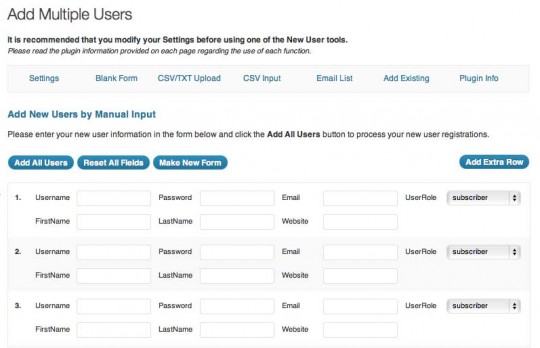
Manual input method within Add Multiple Users
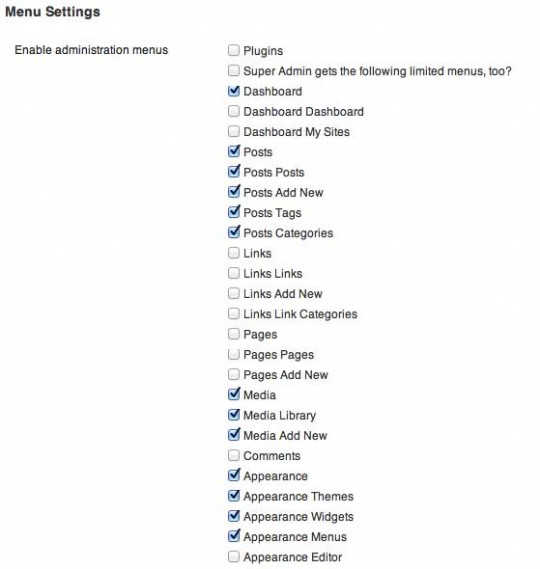
Menus adds additional options to the main Network settings panel. It allows the administrator to disable and remove menus available to users across all sites in the network. There is some redundancy when used in tandem with a plug-in such as User Role Editor. It ensures that users are not distracted by settings and functions that they will not need to create their posts. The administrator simply selects or deselects the menus as required.
Toggling available menus within the Network settings page (truncated listing)
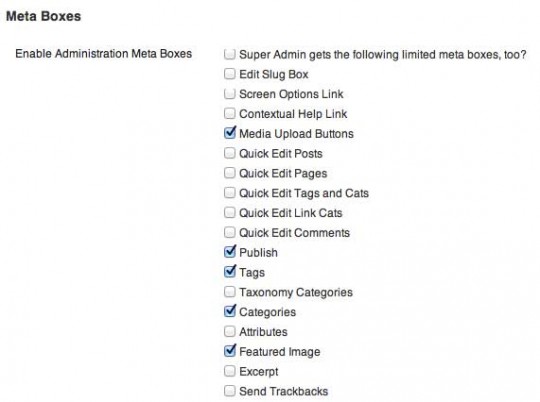
Toggle Meta Boxes performs a similar functions to Menus. The administrator is able to hide meta boxes throughout the WordPress dashboard so that once again users are not distracted by options and settings they simply do not need when creating and publishing their posts. Once again the functionality of this plug-in overlaps with User Role Editor to some extent. It is easy to use and forms part of the Network Settings page.
Toggling the availability of meta boxes within the Network Settings page (truncated listing)
Some of my readers may wonder why I am limiting or curtailing the WordPress experience of my students. At this stage my desire is to simply get the students up and running with the tool as quickly as possible. I have limited the available feature set so that students will not be distracted from the task at hand. My workload is also reduced. The number of technical issues that could conceivably arise is lessened. As time passes I shall increase the user capabilities for the students. I may even set up some of the more tech savvy students as administrators so that they can assist their classmates on the spot.
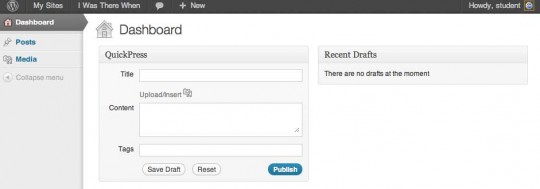
A clean, uncluttered WordPress Dashboard for the students
If you look closely at the screen shot above that illustrates the Dashboard available to the students you can see that they simply have access to Posts and Media. It is clean and uncomplicated.
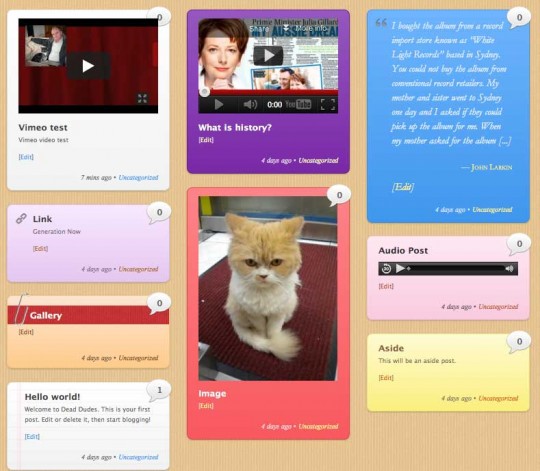
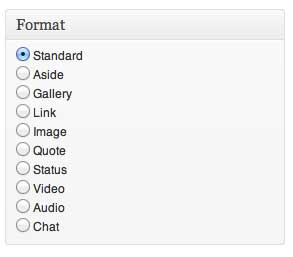
I am employing a theme entitled Wumblr made by the creative team at Themify. The Themify team also created Rezo which I use for this blog. Wumblr is a responsive theme and as a result the site will be fully functional on both desktop and mobile technology platforms. A mock-up of the site is illustrated below. The Wumblr theme allows for the creation of a variety of post styles and the embedding of multimedia is a breeze. Query-post pages are also easy to create. This is not a paid announcement. Themify create great themes and they frequently have sales that allow you to snap up their themes at a bargain price.
Wumblr mock-up screen
Post formatting styles within the Wumblr theme
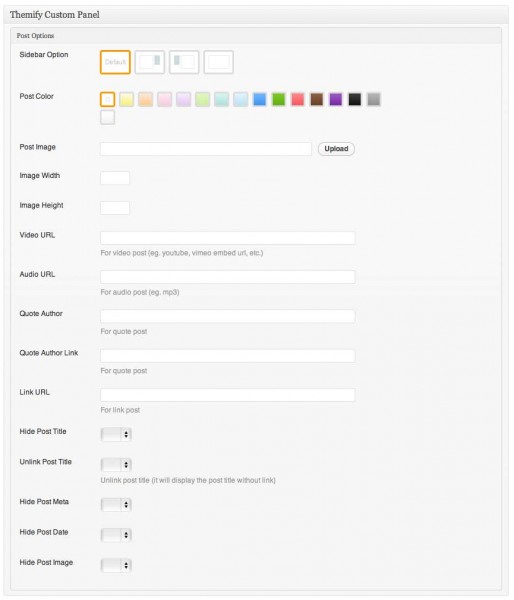
A rich variety of post publishing settings within the Wumblr theme
More posts on how I customise and automate publishing options within the site shall follow. Stay tuned. Please respond to this post with your own WordPress plug-in recommendations and WordPress publishing tips via the comments below. If you have any questions you can send me an email via the contact form.


Recent Comments